Here are some pictures and instructions from an army FM manual on how to tie a "Swiss Seat" this was used for rapelling or extraction purposes if a team didn't have a Hanson, Stabo or Mcguire Rig.
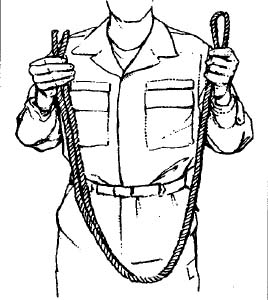
Step 1: Tying a Swiss Seat:
Grasp the 9-foot sling rope at the midpoint (center) of its length, and double the rope.
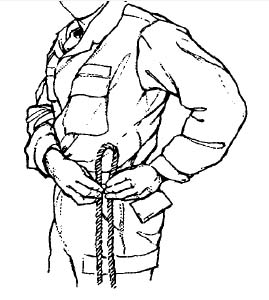
Step 2: Tying a Swiss Seat:
Place the midpoint (center) of the length of the sling rope on the hip opposite the brake hand (the brake hand is the strong hand).
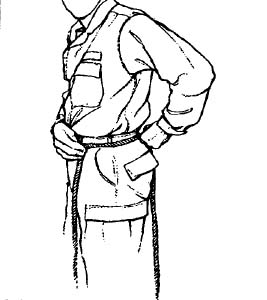
Step 3: Tying a Swiss Seat:
Bring the sling rope around the waist above the hip bone.
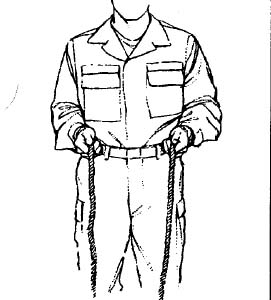
Step 4: Tying a Swiss Seat:
Once the sling rope runs around the back of the waist, hold both ends of the rope out in front of you.
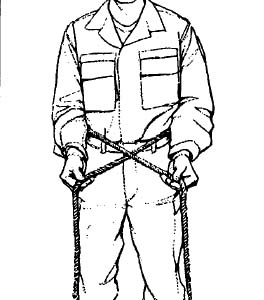
Step 5: Tying a Swiss Seat:
Tie a double overhand knot over the navel by first crossing the right end of the sling rope over the left end.
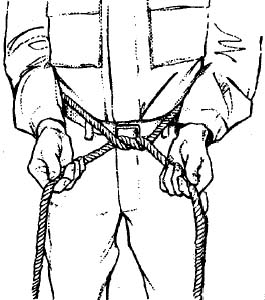
Step 6: Tying a Swiss Seat:
Continue by bringing the left end of the rope (which is in your right hand) up and over the right end of the rope.
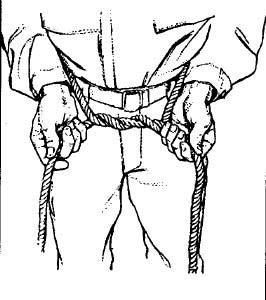
Step 7: Tying a Swiss Seat:
Now take the right end of the rope (which is in your left hand) and tuck it under and then bring it up over the left end of the rope.
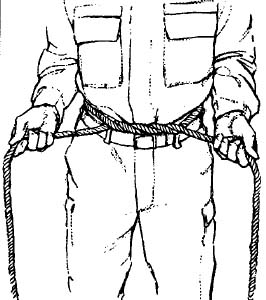
Step 8: Tying a Swiss Seat:
You should now have a completed double overhand knot.
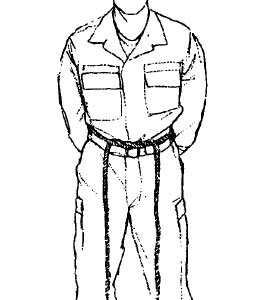
Step 9: Tying a Swiss Seat:
Let the two free ends of the sling rope fall to the ground in front.
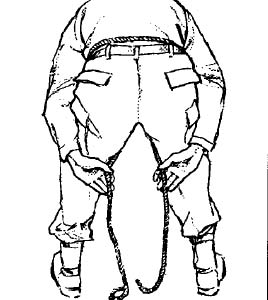
Step 10: Tying a Swiss Seat:
Bring the two free ends of the sling rope down between the legs and up over the buttocks. Ensure that the two free ends do not cross.
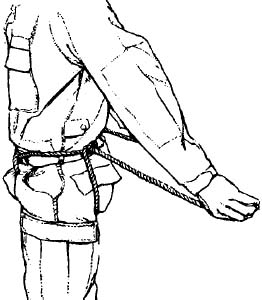
Step 11: Tying a Swiss Seat:
Pass the ends of the ropes over the rope that is tied around the waist at the two points above the center of the two rear seat pockets.
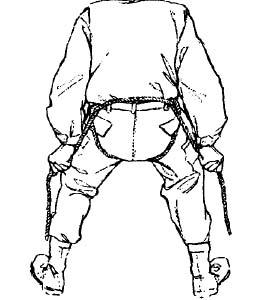
Step 12: Tying a Swiss Seat:
Grab the free end of the rope that is on the left side of the body with the left hand, and the free end of the rope that is on the right side of the body with the right hand. Squat down and simultaneously pull on both running ends of the ropes and stand up. This will tighten the seat. Take the two running ends of the rope down and back over the waist rope from the inside. Bring the running ends back under the ropes that are going across the buttocks.
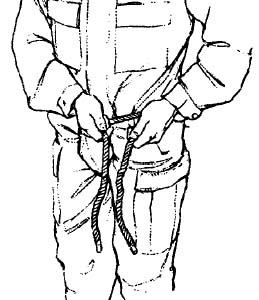
Step 13: Tying a Swiss Seat:
Bring the two running ends to the hip opposite the brake hand.
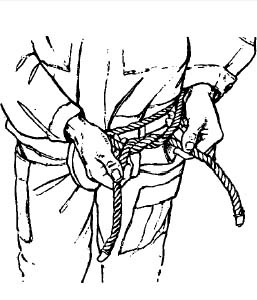
Step 14: Tying a Swiss Seat:
Tie a square knot with the two running ends by crossing the left end over the right. Then tuck the left end under the right and bring it back up and over.
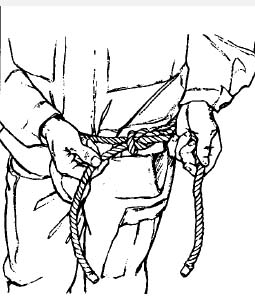
Step 15: Tying a Swiss Seat:
Now take the right running end and cross it over the left running end. Then tuck the right end under the left and bring it back up and over and tighten. You should now have a square knot.
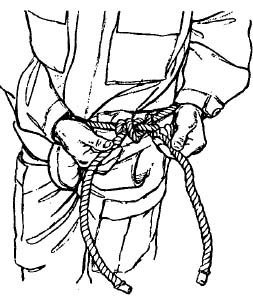
Step 16: Tying a Swiss Seat:
Now tie two overhand knots with the running ends, one on each side of the square knot. This will help secure your square knot and is done by passing the running end under the rope that is tied around your waist and then passing it over and then back down between itself and the rope around the waist.
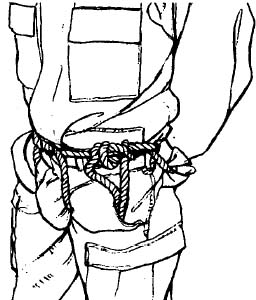
Step 17: Tying a Swiss Seat:
Place any excess rope in the trouser pocket near the square knot. Congratulations you have just tied a Swiss Seat! Now for the snaplink placement....
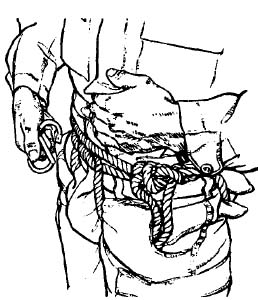
Step 18: Tying a Swiss Seat:
Hold the snaplink with the gate facing towards you and the hinged end down.
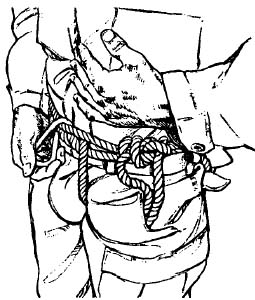
Step 19: Tying a Swiss Seat:
Place the hooked end of the snaplink against the navel, then place the end of the snaplink through the single rope that is around the waist and the two ropes forming the double-hand knot.
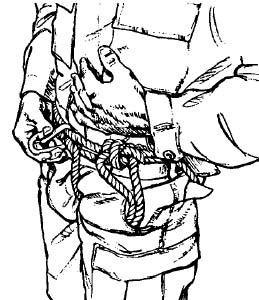
Step 20: Tying a Swiss Seat:
Now rotate the snaplink a half turn so that the gate is facing up and will open away from the body. That's it! You are now ready to hook up to a rope and go rappelling!!!

No comments:
Post a Comment